
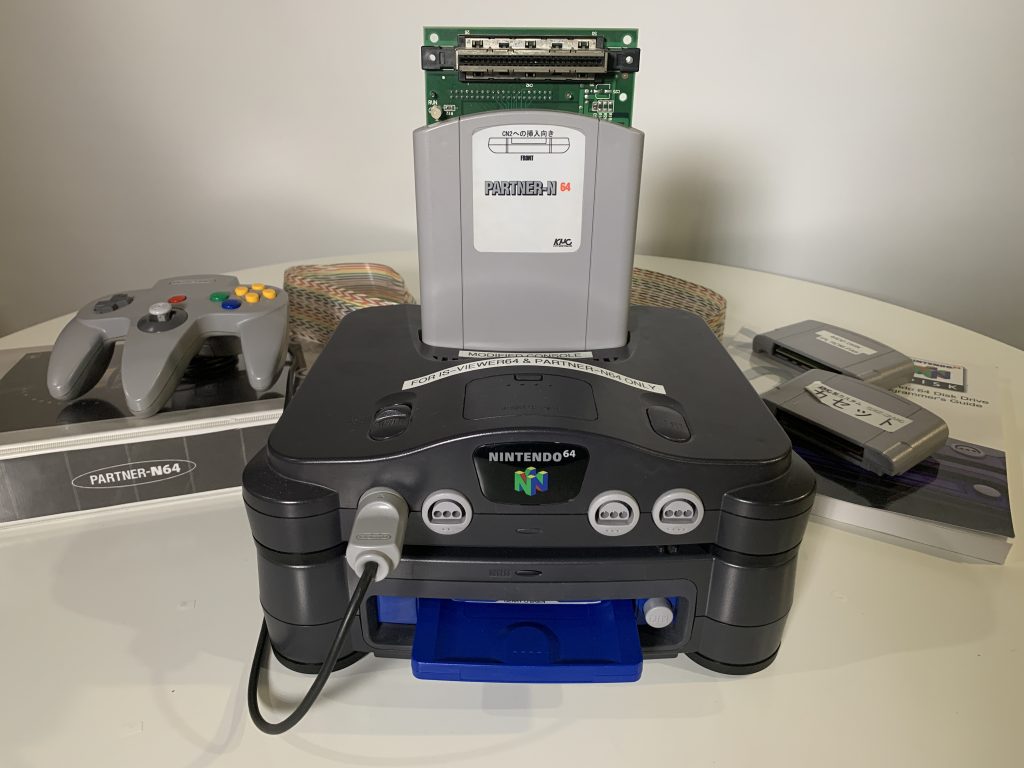
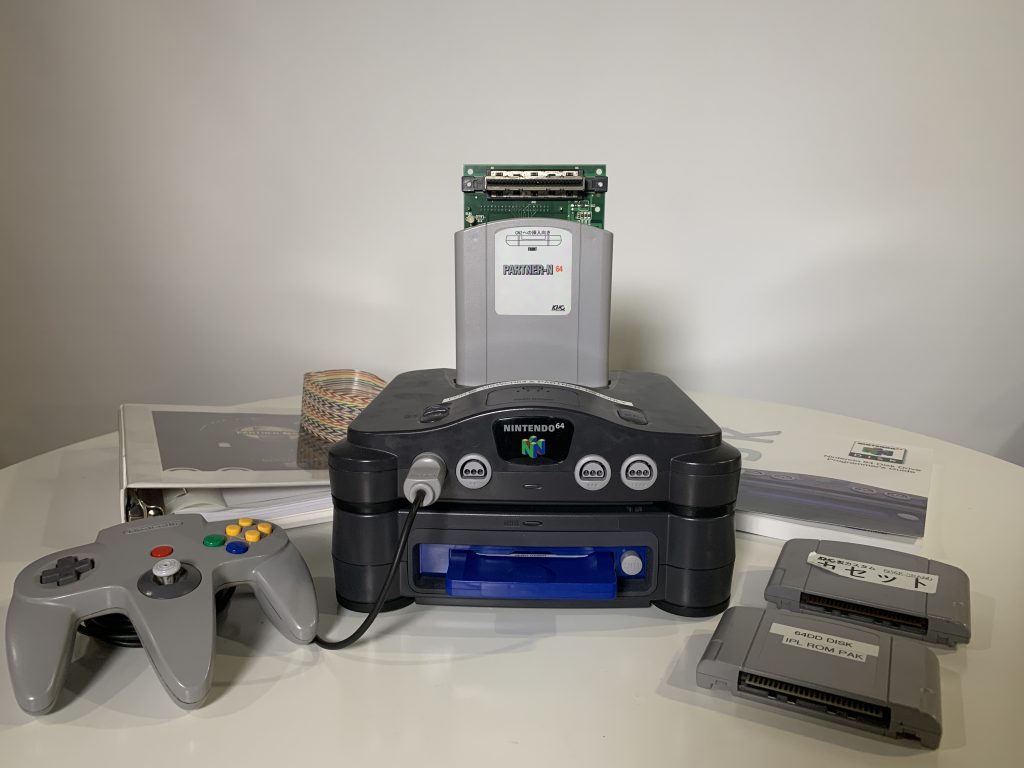
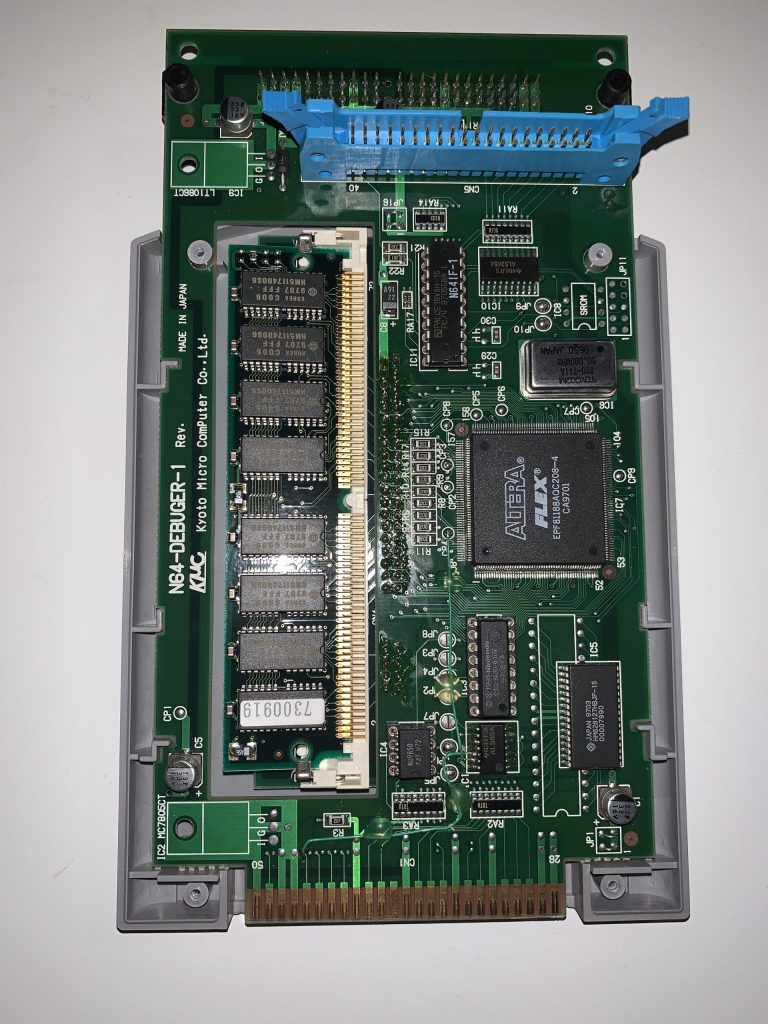
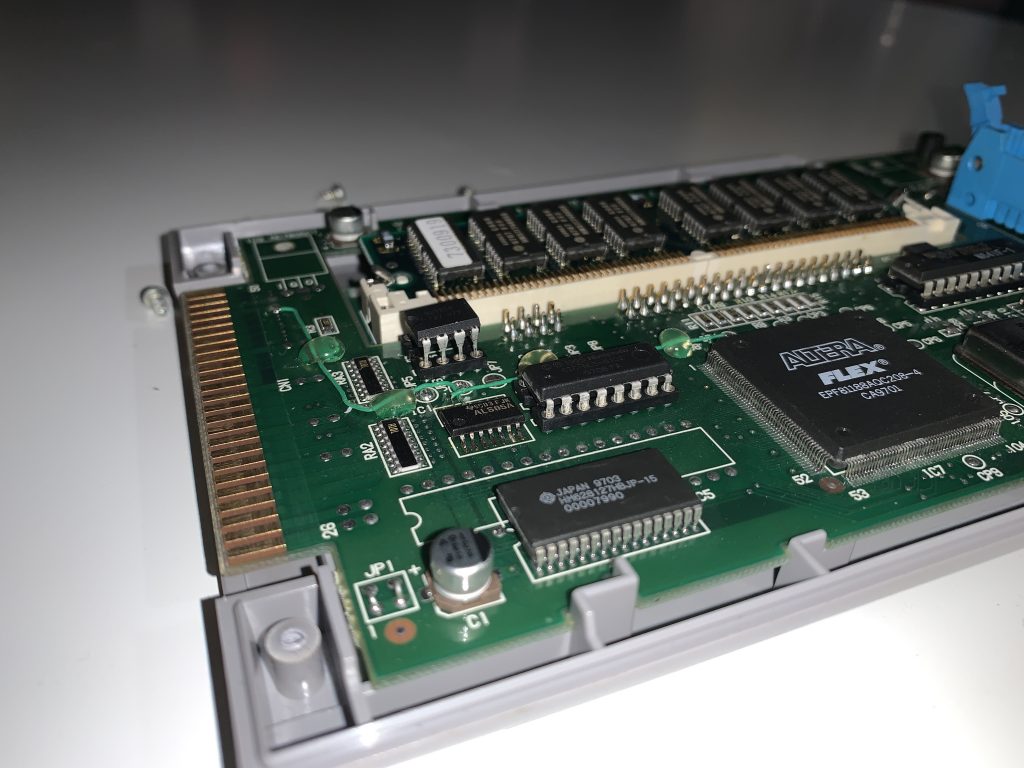
This is the PARTNER-N64 PC development kit for the Nintendo 64. This unit was made for Nintendo by the company Kyoto Microcomputer (KMC). An in-depth video demo of this dev kit is shown futher below.
These cartridges provided real-time debugging features, however many developers still preferred using the SN-Systems “SN64” development kits.
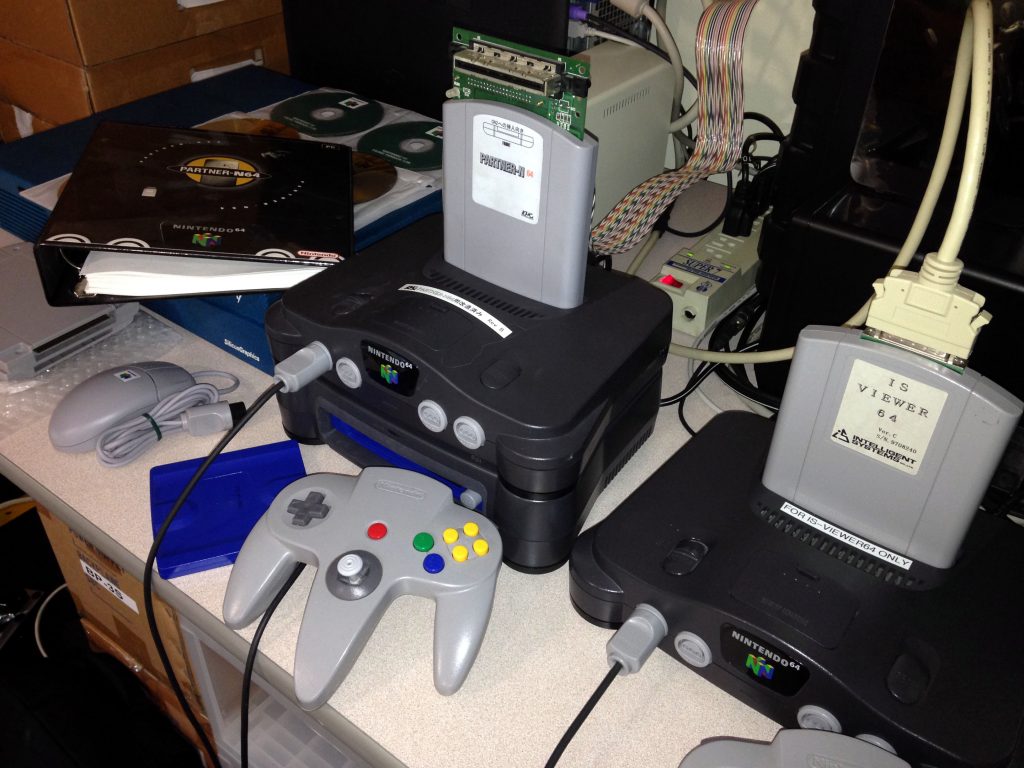
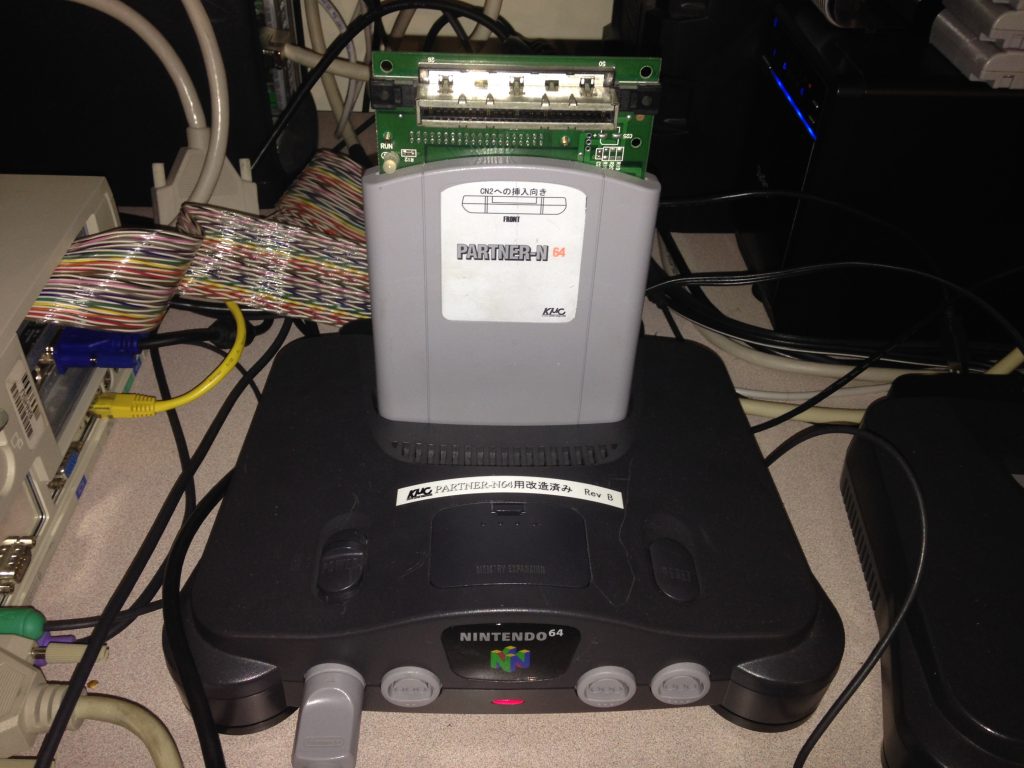
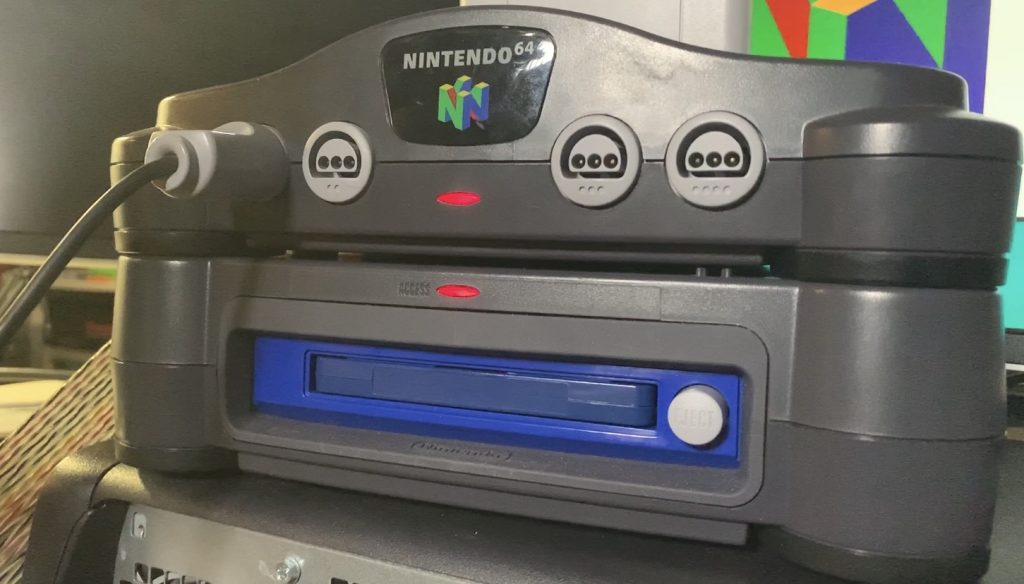
The Partner-N64 debugger system does require a specially modified N64 console, in order to work correctly. (See image above) This special N64 console gave the Debugger software control over the hardware to activate two specific features.
- Trigger a Halt of the game (pausing the game) for executing Breakpoints. (IRQ)
- Trigger a Reset of the N64 console. (RESET)
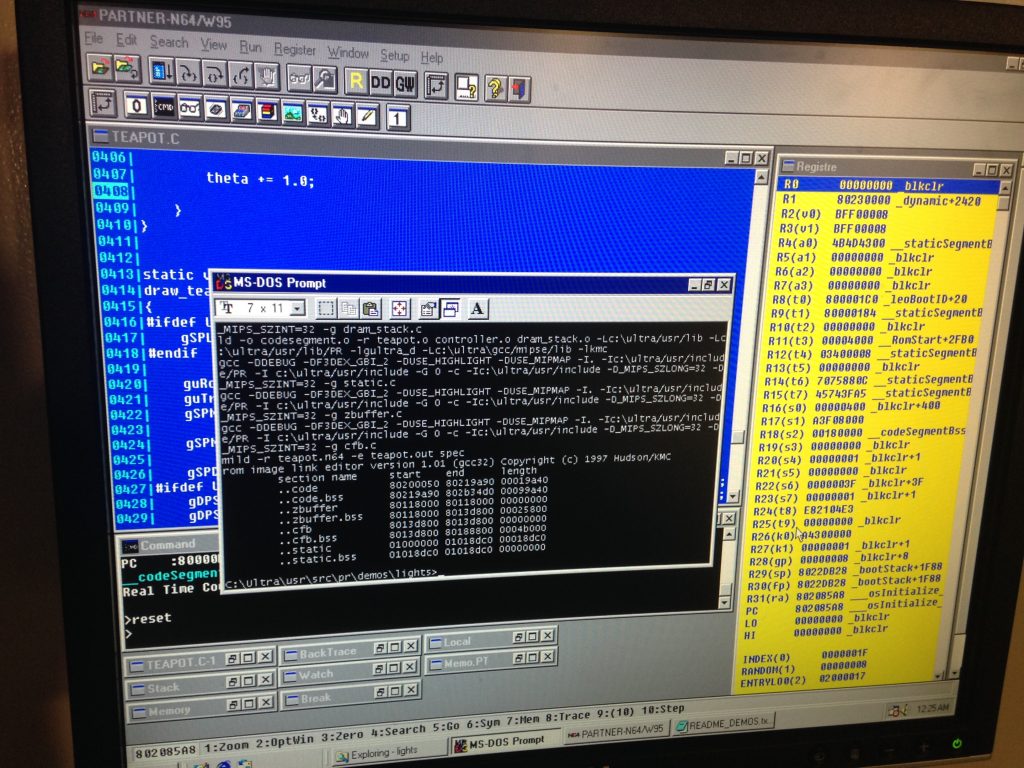
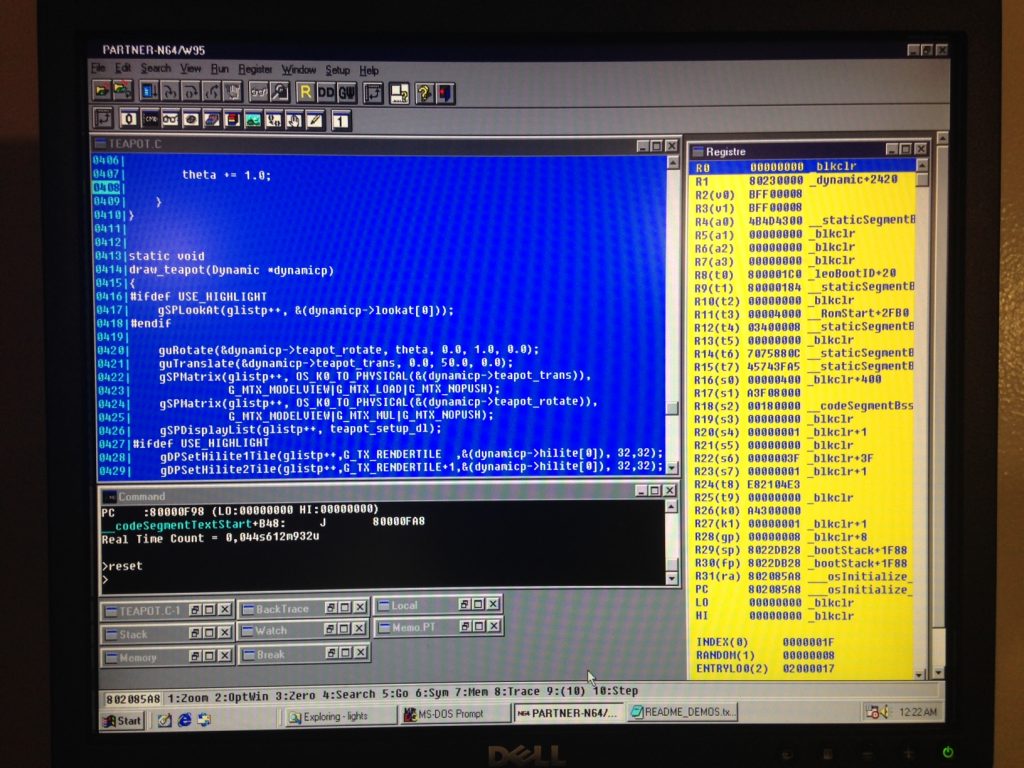
A Breakpoint is essentially a software feature where the developer can specify a line within the source code to pause the game. So while the game is paused, the developer can analyze the N64 system memory to see if there are any problems or Bugs. This is done during game execution (or during RUNTIME). The developer can then resume the game (un-pause the game) and continue playing the game until another point in the code is reached….or if an error is detected. If a condition is met or a certain line of code is reached, then the game is once again halted. This is the basic functionality of a Software Breakpoint.
The modified console also allows the debugger software to RESET the N64 console as needed. The reset is triggered by a software command. So a Developer could run a series of tests that require the console to be reset multiple times. Without this specially modified console, these features would not be possible.
The modifications performed on the console, entail the addition of several Tie-lines. These are essentially just small wires that connect certain signals on the N64 circuit board, to another area that are not part of the original design.
Two signals in particular needed to be re-routed from the cartridge slot connector, to the N64 CPU. An “IRQ” and a “RESET” signal specifically.
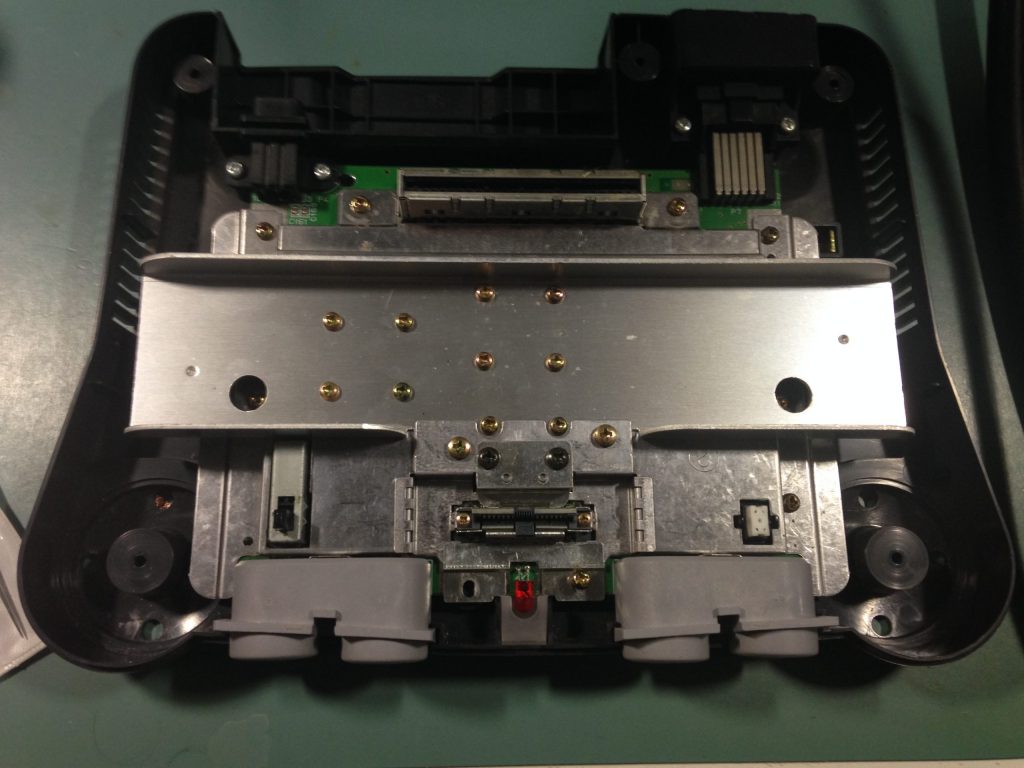
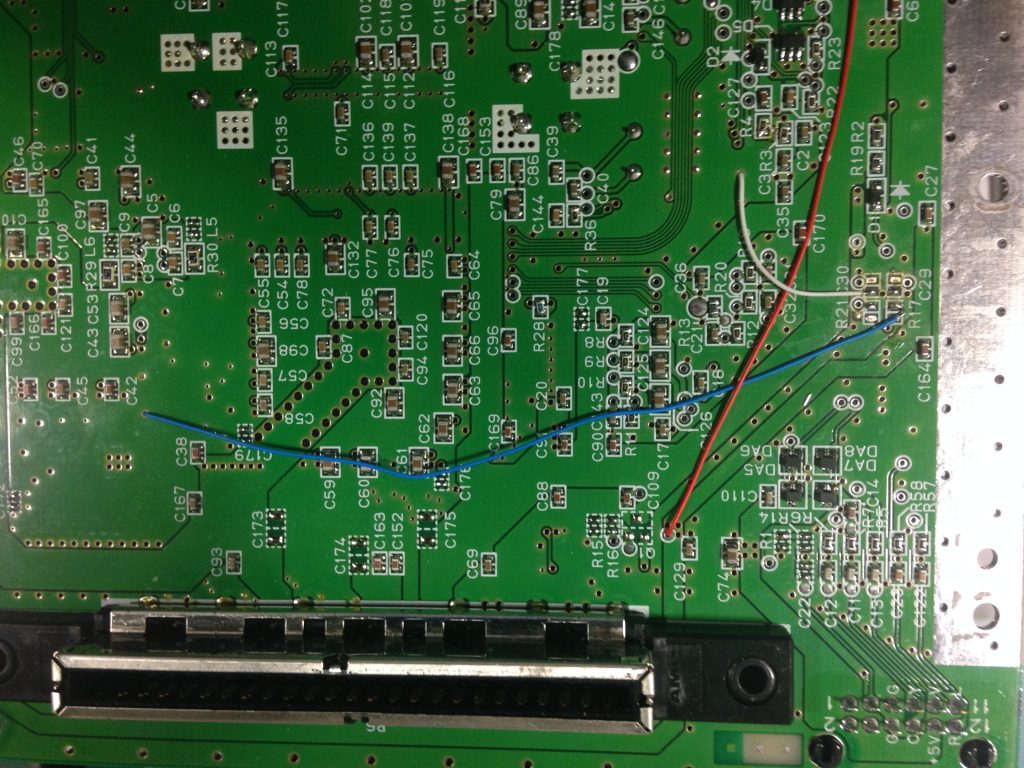
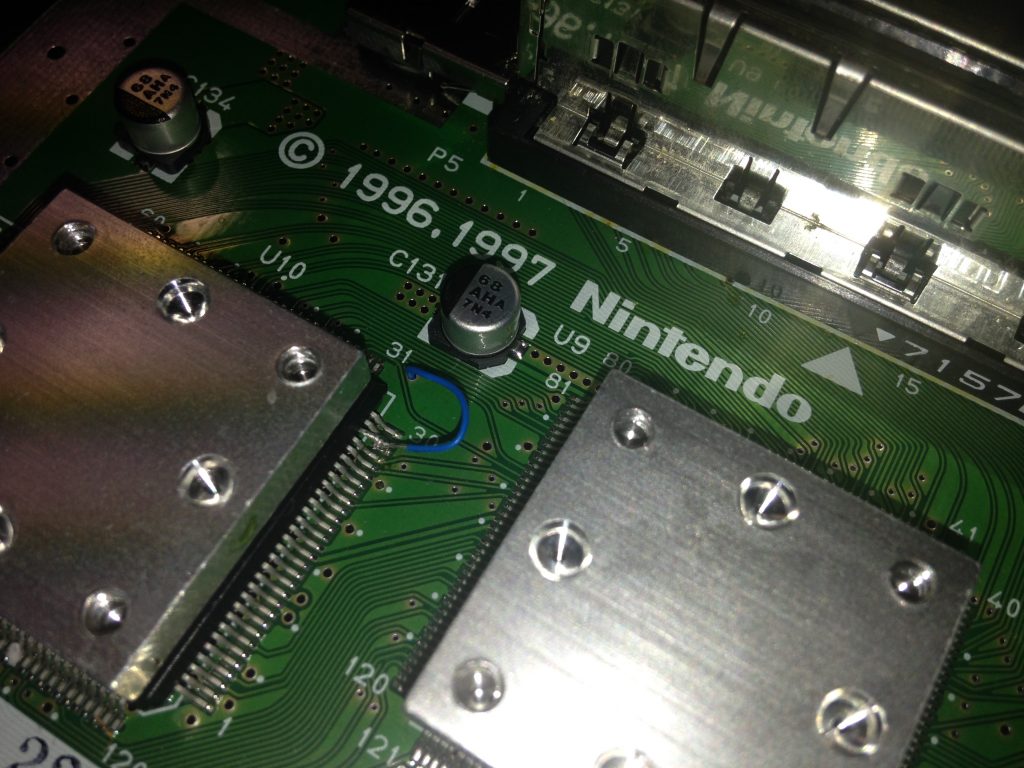
These two signals allow the Partner-N64 development cartridge to control the CPU IRQ (Interrupt Request) to essentially PAUSE the N64 on command. The same applies for the console RESET signal, allowing the software to RESET the N64 console as needed.
So the Flow of these debugging features goes something like this:
Debugger software triggers Breakpoint/RESET >> Partner-N64 sends IRQ/RESET signal >> Modified console routes these signals to the N64 CPU to trigger those features.
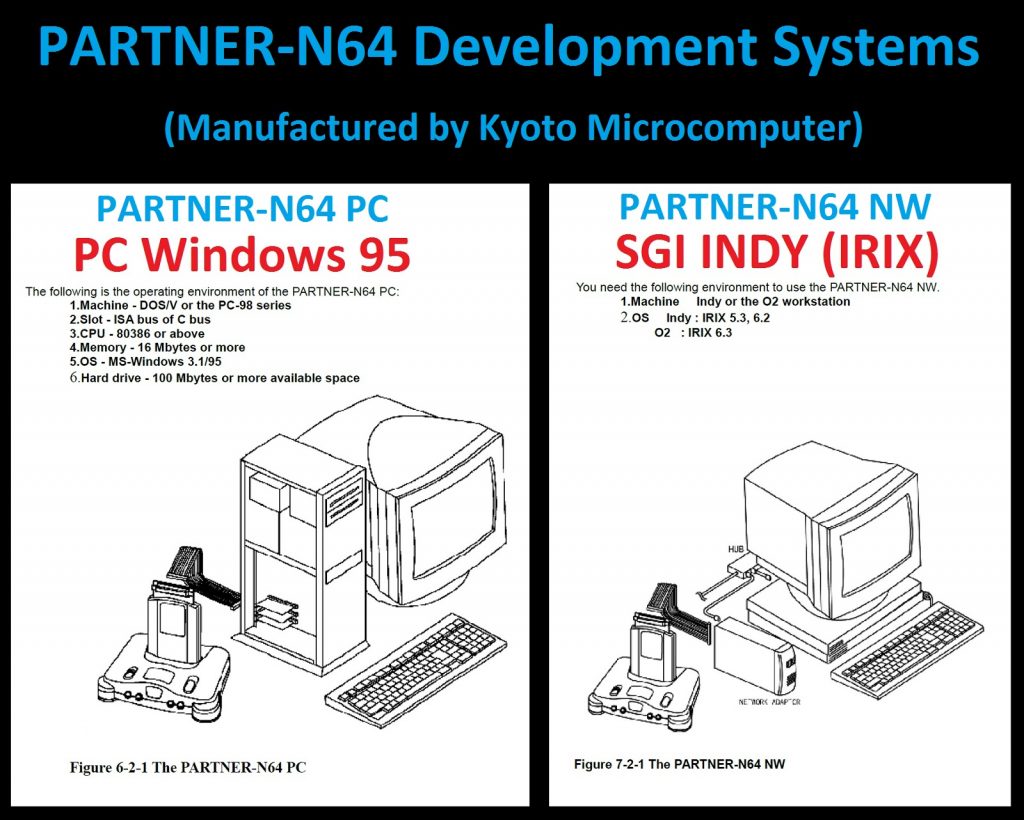
There were two versions of the Partner-N64.
As shown above: One was entitled: Partner-N64PC for IBM compatible computers running Windows 95/98. The second version was entitled: Partner-N64NW for developers using Silicon Graphics (SGI) Workstations.
The Partner-N64 development kits provided debugging features for the N64, as well as for the failed 64DD development system.
This was a Disk drive reader/writer addon unit for the N64, that was only released in Japan. Unfortunately the system failed miserably after its launch day. In turn, the system was cancelled and never released in North America.
Now an important note: There were actually two versions of the 64DD. One was the Retail version which had a Black colored bezel around the Disk drive slot. As shown below:

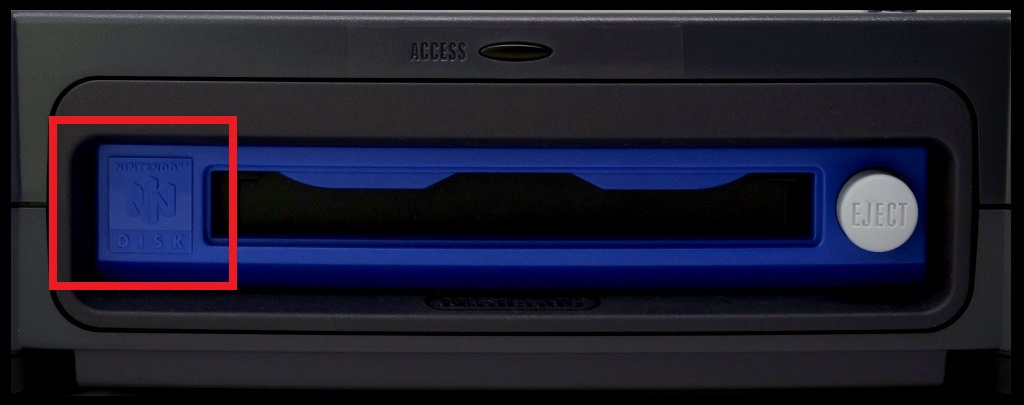
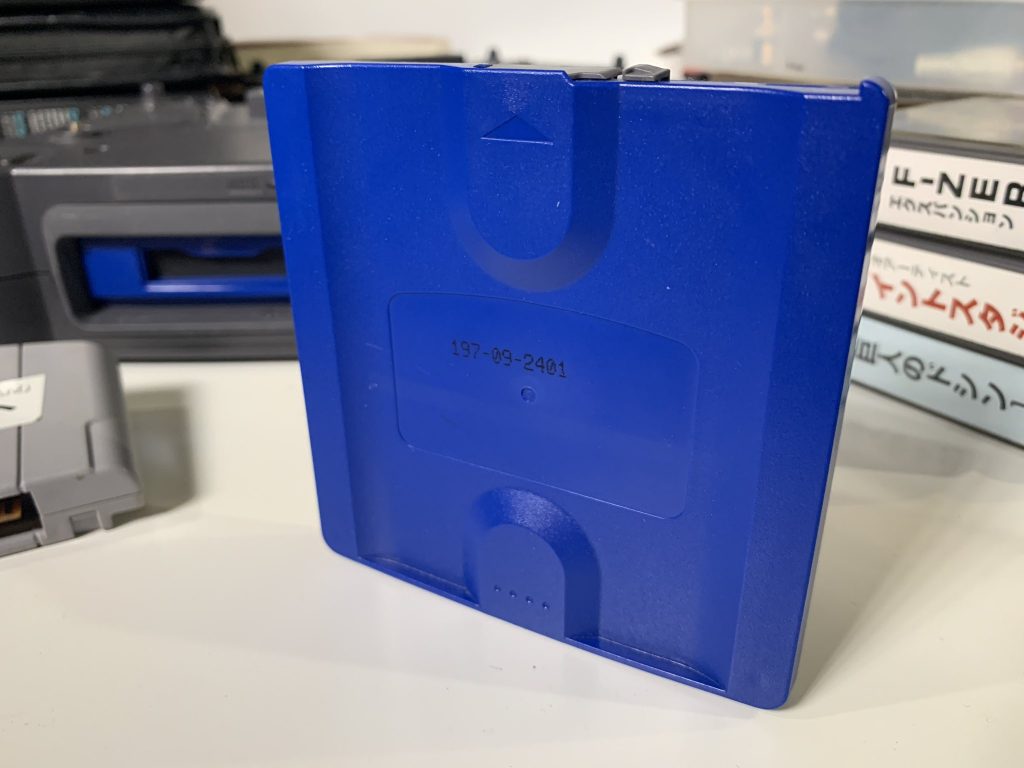
The second version was the 64DD Development version, and was only available to Nintendo 64 developers. This version of the drive was easily identifiable by its Blue bezel around the disk slot…as shown below:

The 64DD system would allow an N64 console to Dock on its topside, connecting the two systems together and providing the use of special proprietary magnetic disks, to expand the system memory, and allowing developers to create more advanced games.
The disks used a comparable technology to the 90’s era Iomega ZIP100 disks, however the design was proprietary to Nintendo. The Retail 64DD used Gray disks, and the 64DD Development Drives used Blue disks. As shown below:
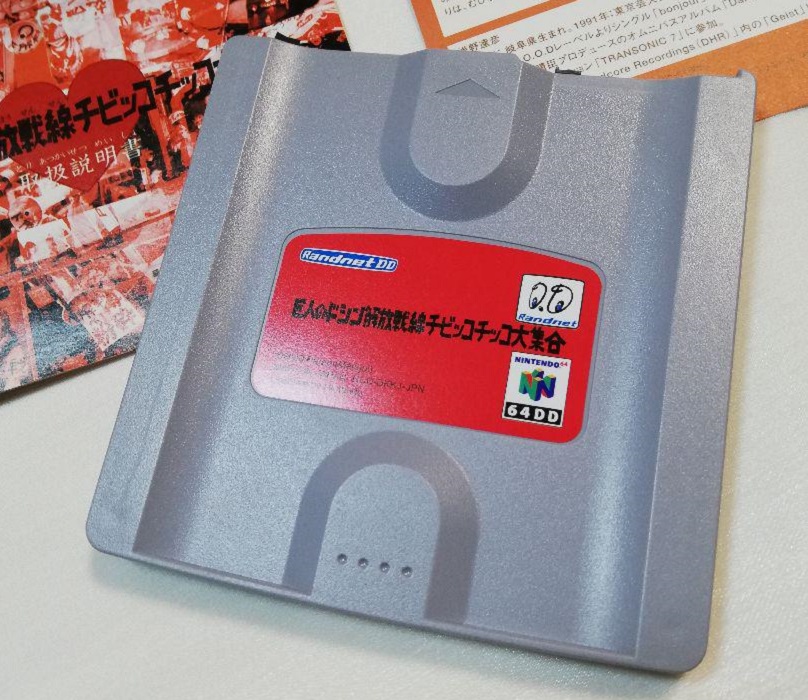
64DD Gray Retail Game Disk.
There were mechanical differences between these two systems, in that the internal magnetic disks would spin in different directions depending on the version of the system used. (Retail or Development). This prevented development disks from being used on retail drives, or vice versa.
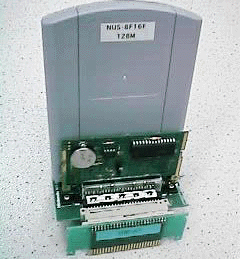
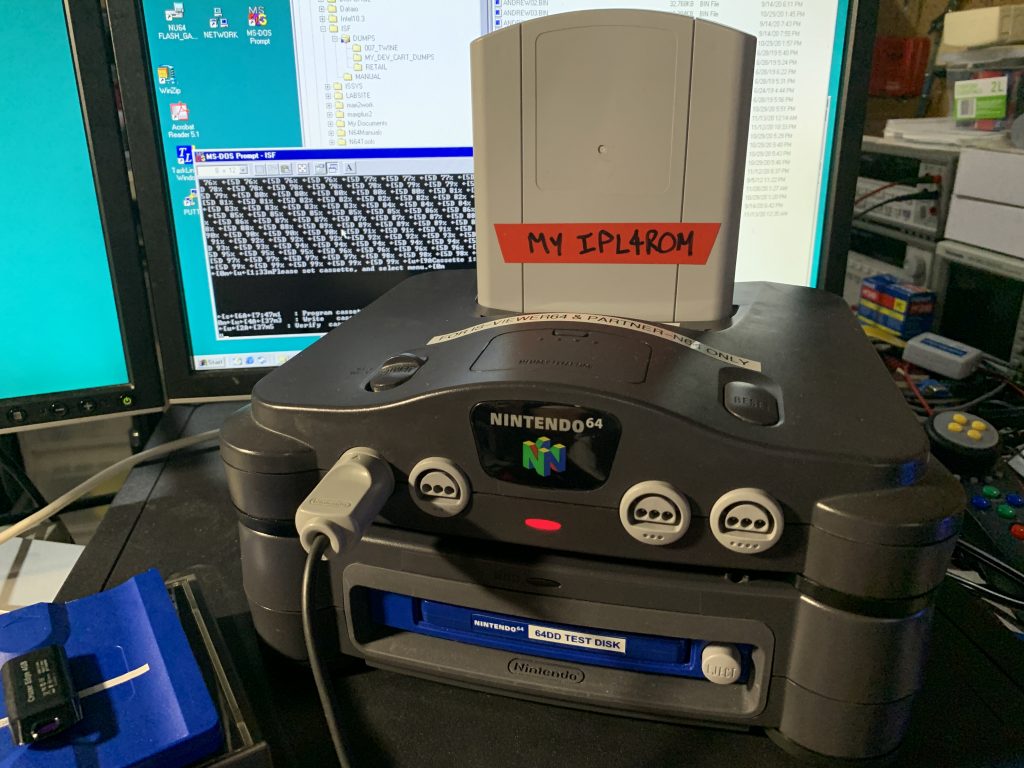
Now, when using the Partner-N64 to develop on the 64DD, there was special FONT and WAV data information that the 64DD required. Developers needed a special cartridge called the “IPL ROM PAK” which stored both the FONT and WAV data.
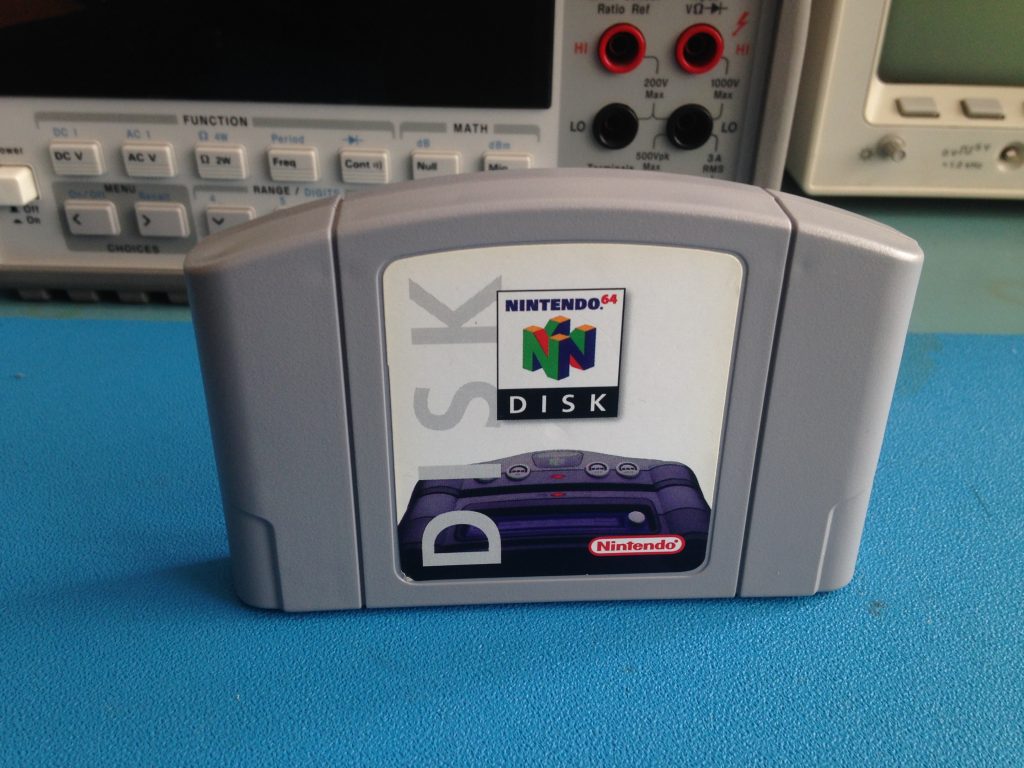
By inserting this cartridge into a special slot located at the top of the Partner-N64 dev cart, the system would be able to access this special data. As shown below:
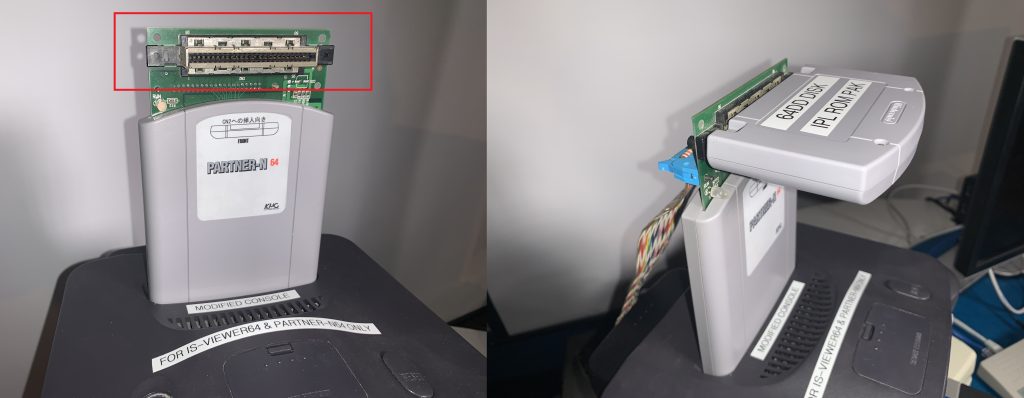
MAKE NOTE: The Partner-N64 dev cartridge is a requirement when using a 64DD development drive. They are needed in order to load a special 64DD Bootloader program. Also, the top cartridge Slot was used for interfacing both the IPL ROM PAK as well as SRAM Test cartridges.
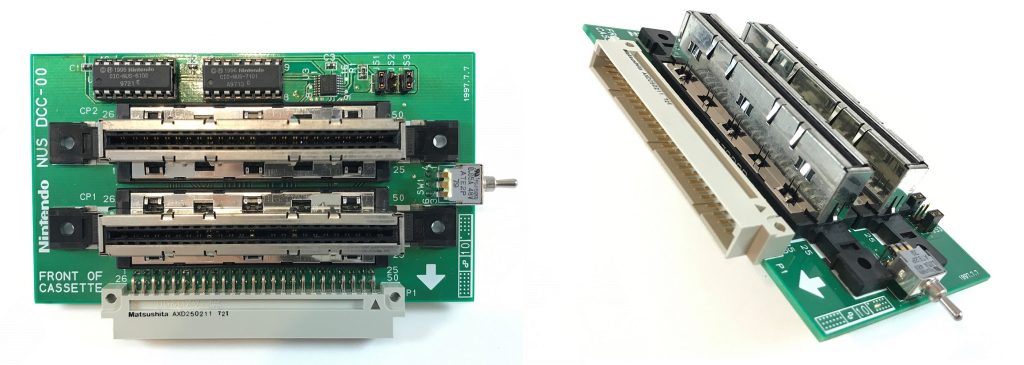
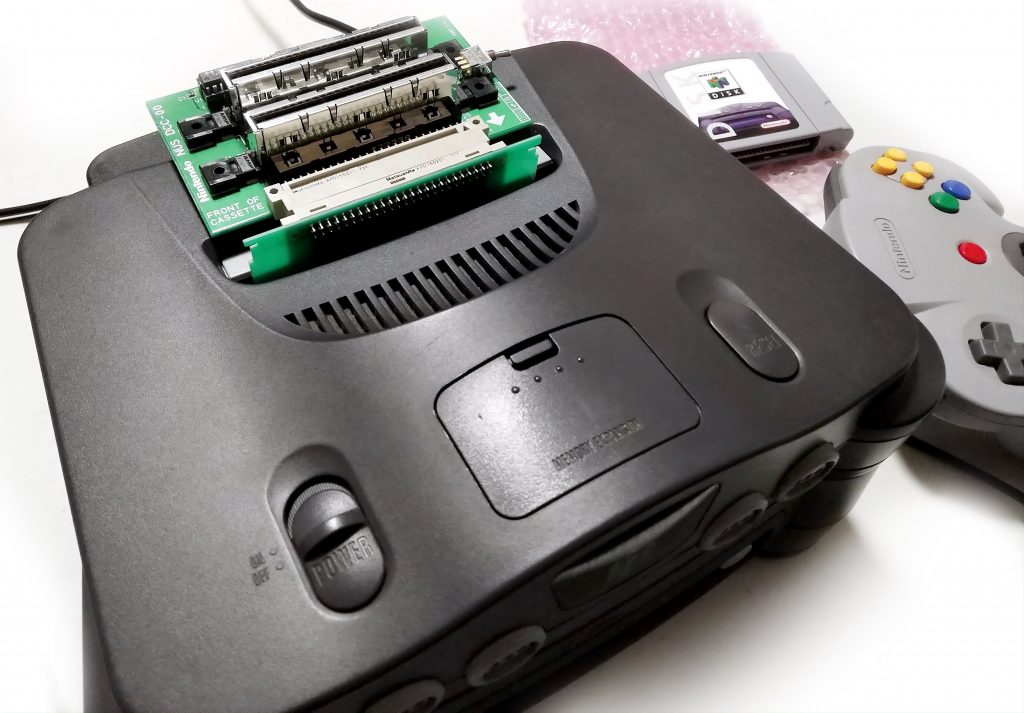
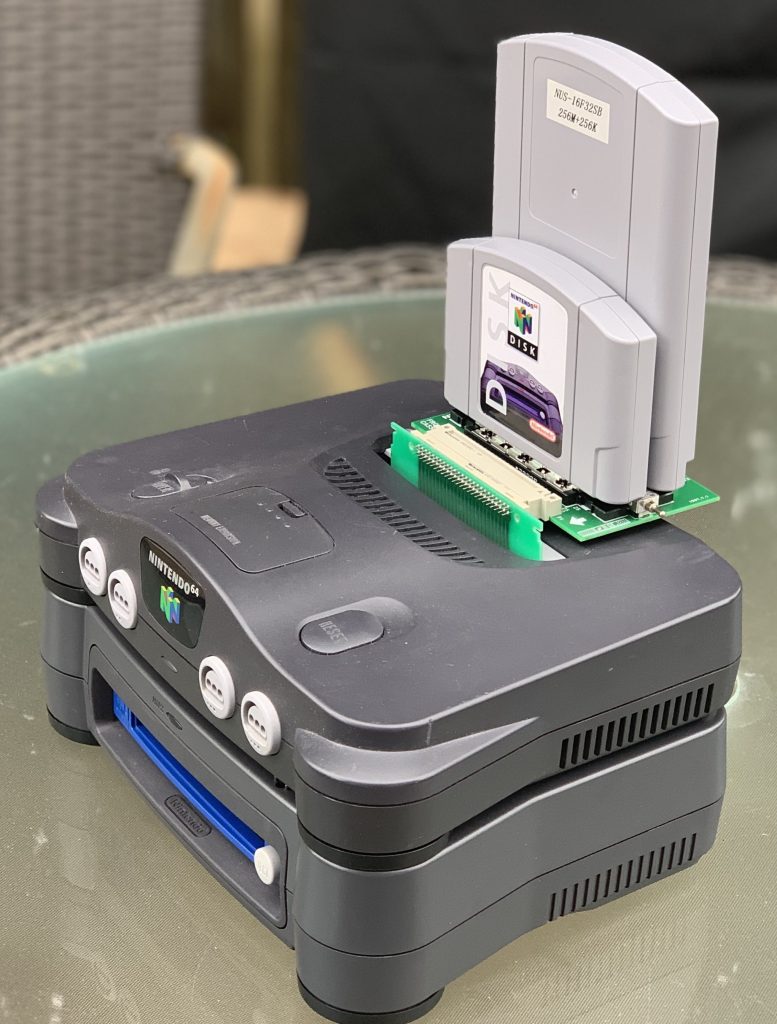
Shown in the image below: is a special adapter board for the 64DD called the DCC adapter board.
(Model#: NUS DCC-00)
So What the Heck is this DCC adapter thing used for??
This adapter would allow developers to connect two separate cartridges in parallel, and interface them into the cartridge slot on the N64. This special adapter was only used when developers were testing games with an N64 development flash cartridge. Like the ones shown in the image below:
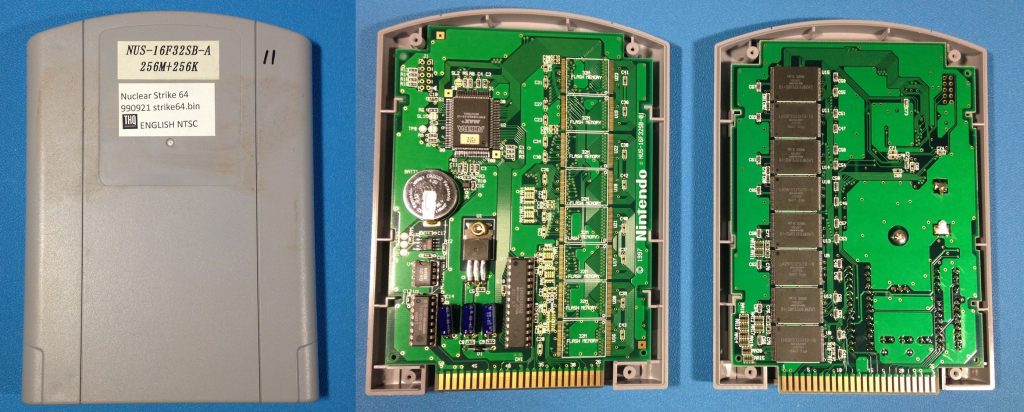
As you can see…these were much larger in size, compared to standard retail cartridges. So Why would developers need to connect two cartridges together?
When Developers were testing games for the N64 …near the final stages of their testing, they also needed to test their games on actual cartridges to confirm they would actually work; and would load from cartridge memory.
So to test this, developers would use a Development Flash cartridge. Now, certain Dev cartridges did not come with internal RAM installed, and therefore the DCC adapter board would allow them to interface a special RAM cartridge into the system. That being an “SRAM TEST CARTRIDGE” as shown below:
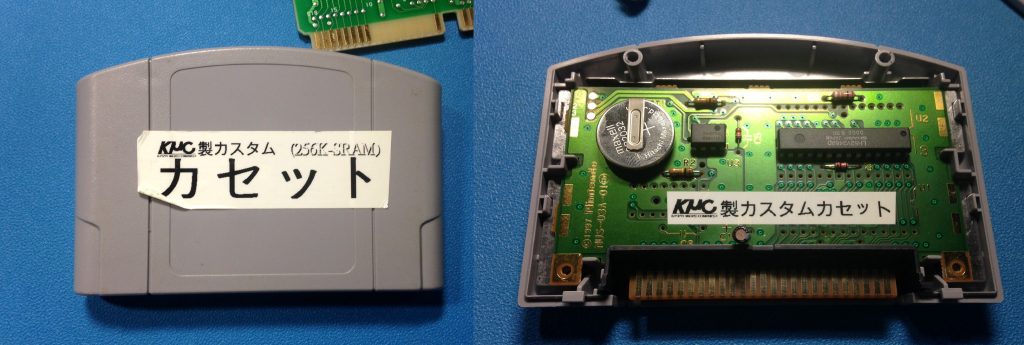
The N64 could then run tests and access both the Flash cartridge memory, as well as the added SRAM, even though they were stored in two separate cartridges.
There were also instances when developers needed to test or run a 64DD game, running on a cartridge. However, this would remove the Partner-N64 dev cart from the 64DD setup. As mentioned before, this is a requirement when developing on the 64DD. Without the Partner-N64 connected, the required bootloader program would not get executed. This bootloader program is called the “IPL4ROM”.
This presented a problem. So the workaround for this was to use the DCC adapter board. They would connect an N64 development Flash cartridge that stored the (IPL4ROM bootloader), as well they would connect the special “IPL ROM PAK” cartridge to provide the 64DD with the needed FONT & WAV data.
As shown below, with this DCC adapter setup, the 64DD could proceed to Boot using the Bootloader stored on the Dev flash cartridge, and then load FONT and WAV data from the IPL ROM PAK cartridge.
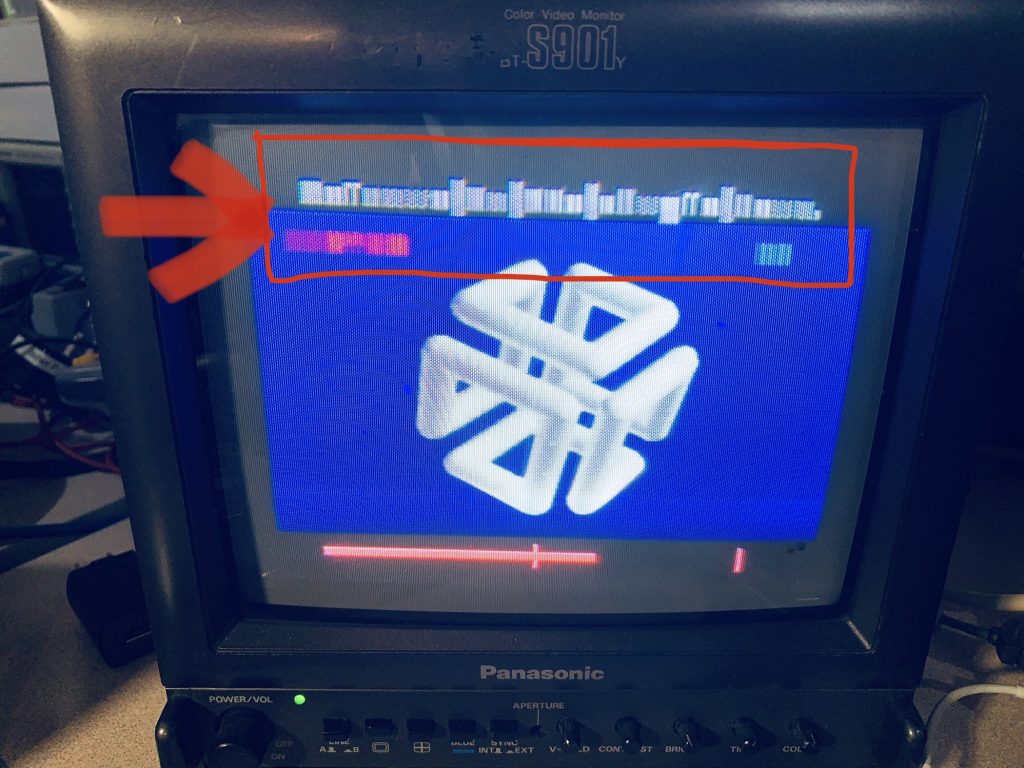
Now a proof of concept: If the IPL ROM PAK cartridge were removed (like in the image below) and only the N64 Dev flash cartridge was inserted… The 64DD could at least Bootup. However, with the IPL ROM PAK removed, the FONT data would not be available to the 64DD.
As a result, any loaded DEMO/GAME would not be able to display text properly. As you can see in the image below, the text area at the Top of the screen is displaying garbled text.
So it is good to realize that the 64DD dev systems do not have an IPL ROM chip. This is done so that the Partner-N64 debugger systems can load the IPL4ROM image directly when performing debugging functions.
The removed component form the 64DD development drives is the IPL ROM chip.
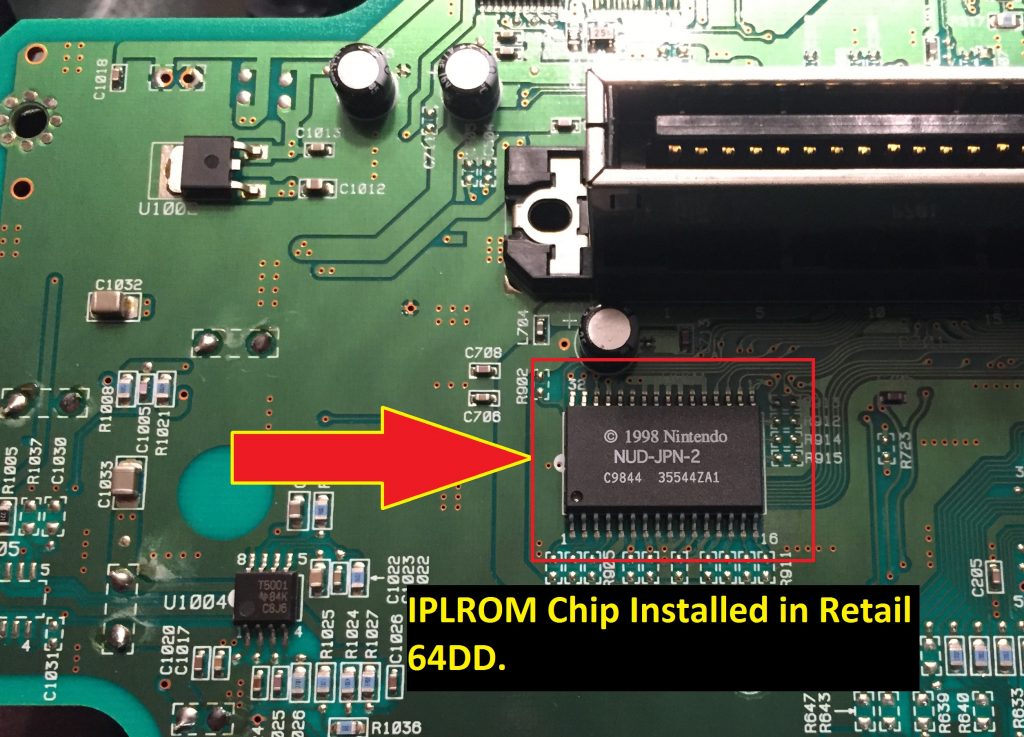
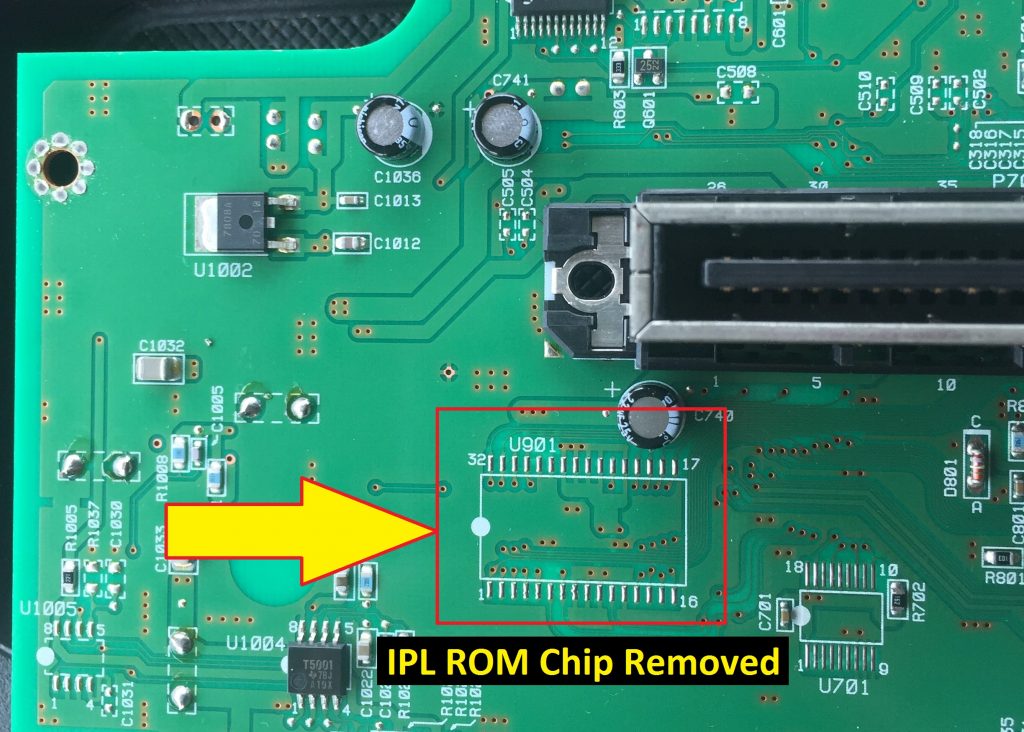
The chip was intentionally removed from the design so that the Partner-N64 is able to load the “IPL4ROM” bootloader directly for debugging purposes. So again, this is just how the development system were designed. The Partner-N64 loads the IPL4ROM first, and then loads the game ROM under test, into the cartridge SRAM.
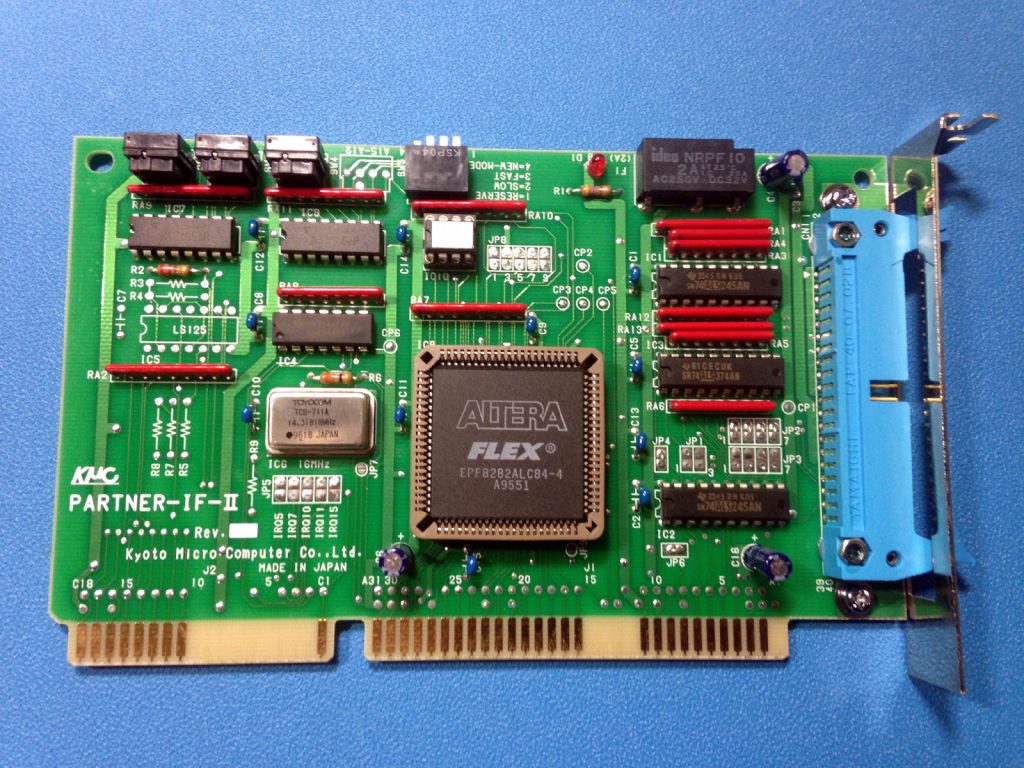
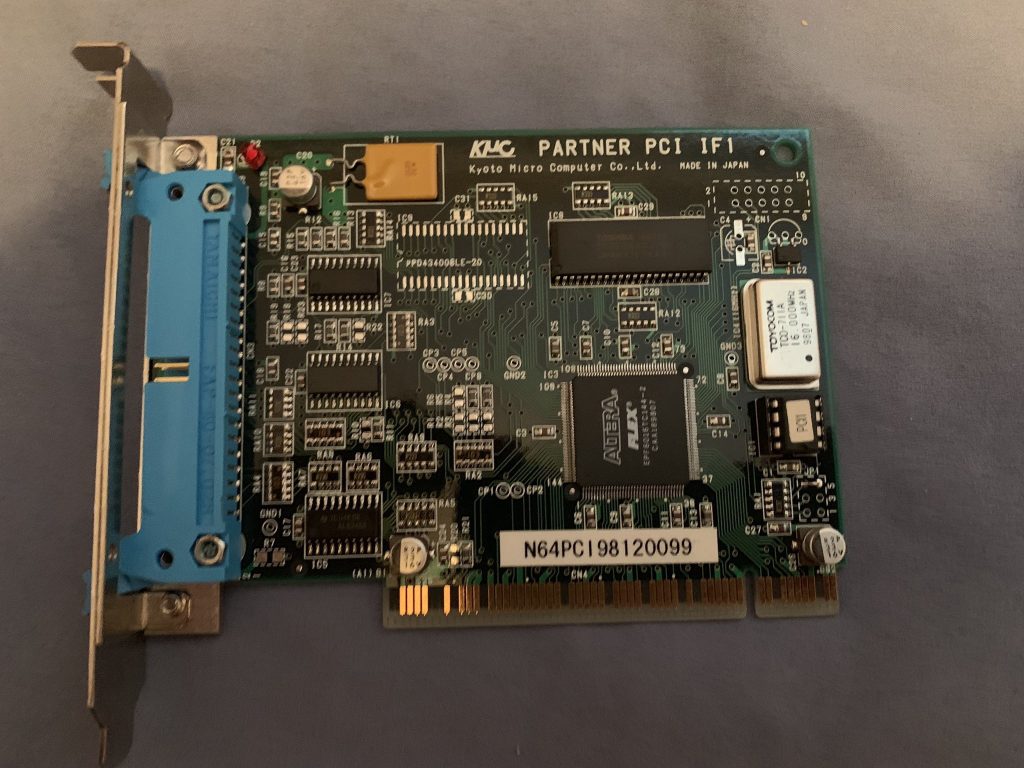
The Partner-N64 Dev carts would connect to a development PC using a special parallel IDC Ribbon cable.
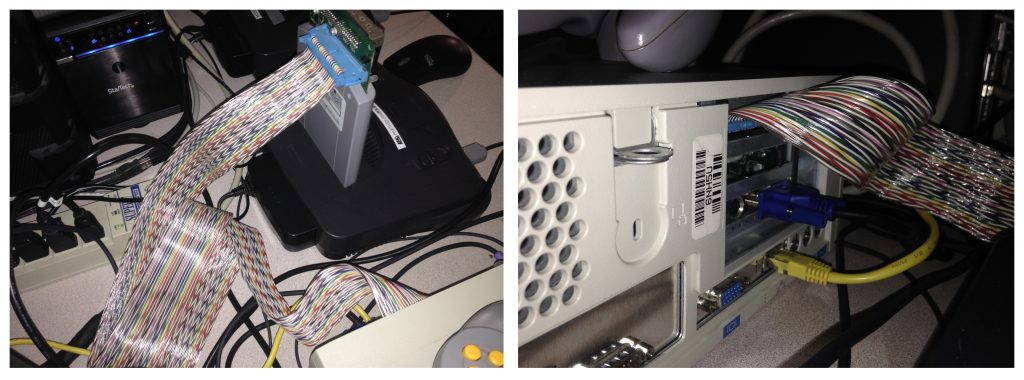
This would connect to the back of the Dev cartridge, and then interface to a Special parallel interface card installed in an IBM compatible PC, which would be running the debugger software.

Here is a very in-depth Video hardware Demo on the Partner-N64PC development Kit that I posted on my YouTube Channel last year.
Enjoy!
-Gerry
-= END =